
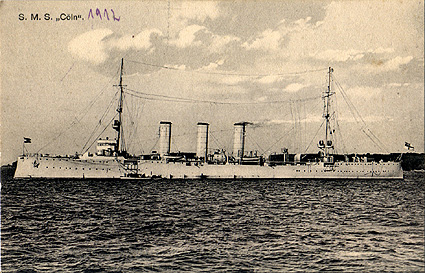
While Jutland is by far the most prominent naval battle of WWI, it is far from the only battle fought in the North Sea. The first months of the war saw several clashes as both sides tested the other's strength, including several cases where the Germans came close to their desire of defeating elements of the Grand Fleet in detail.
Roger Keyes
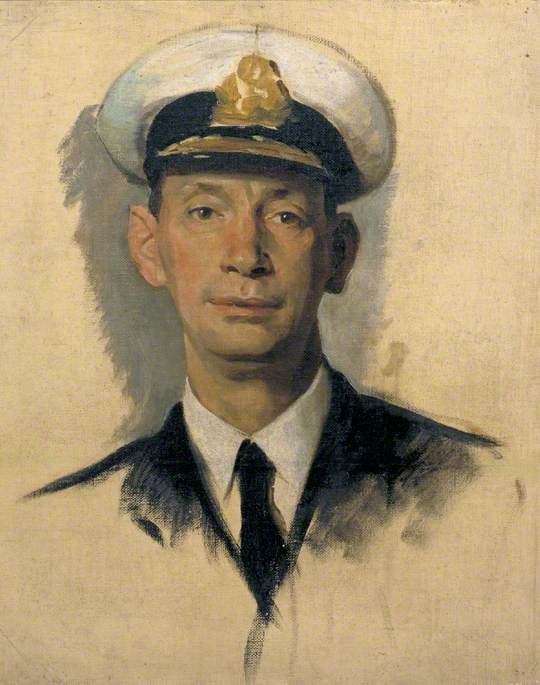
The first battle came a month after Austria declared war on Serbia. Roger Keyes, the aggressive commander of the submarine flotilla based at Harwich, had received reports on German patrols in Heligoland Bight, just off the German coast, and proposed a sweep by the destroyers and cruisers of the Harwich Force under Reginald Tyrwhitt to attack them as they changed over at dawn, with his submarines positioned to attack any heavy ships that came out in support. In case things went wrong, the Grand Fleet would be in support.
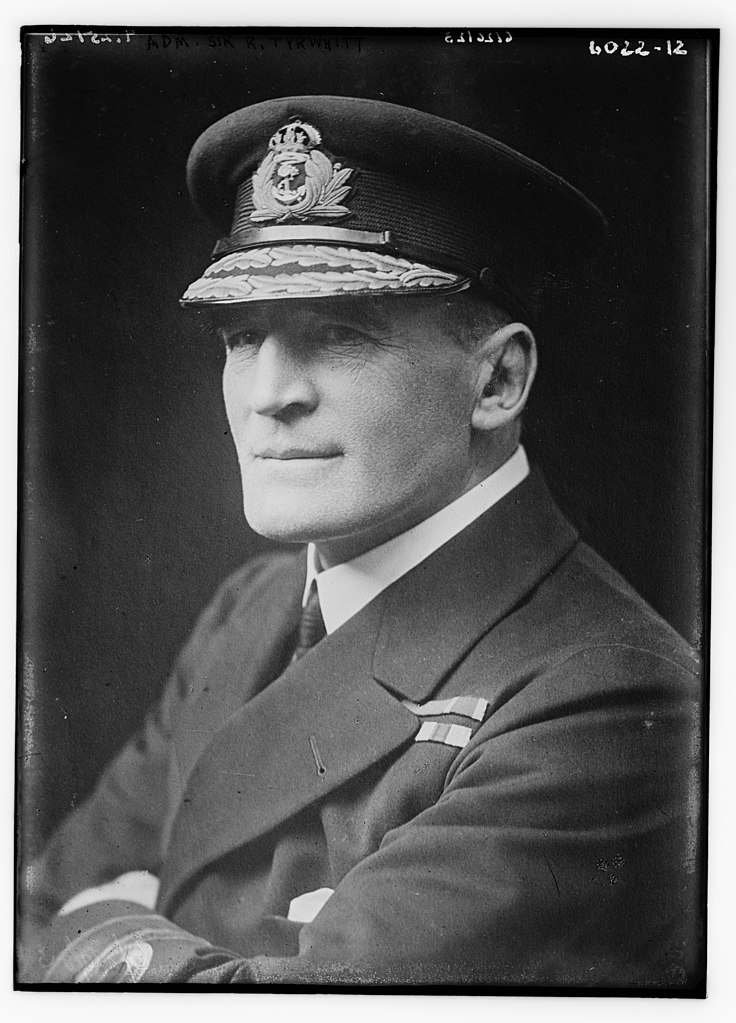
Reginald Tyrwhitt
The Admiralty staff was not wild about the plan, and Keyes managed to push it through by appealing directly to First Lord of the Admiralty Winston Churchill, always a sucker for a bold plan. The plan was approved, although the start time would be delayed to allow the night patrol to return to harbor, and the support was cut from the entire Grand Fleet to only battlecruisers Invincible and New Zealand and a few obsolescent armored cruisers. The plan would be executed five days hence, but two of those days elapsed before John Jellicoe, commander of the Grand Fleet was informed. He decided to send more forces in support, dispatching battlecruisers Lion, Queen Mary and Princess Royal under David Beatty and six light cruisers under William Goodenough. Unfortunately, the Admiralty Staff was still being bad at communication, and word of this support failed to reach Tyrwhitt and Keyes. As a result, the British submarines were informed that the only British ships bigger than a destroyer that would be in Heligoland Bight were Tyrwhitt's cruisers Arethusa and Fearless, with the obvious potential that brought for friendly fire.
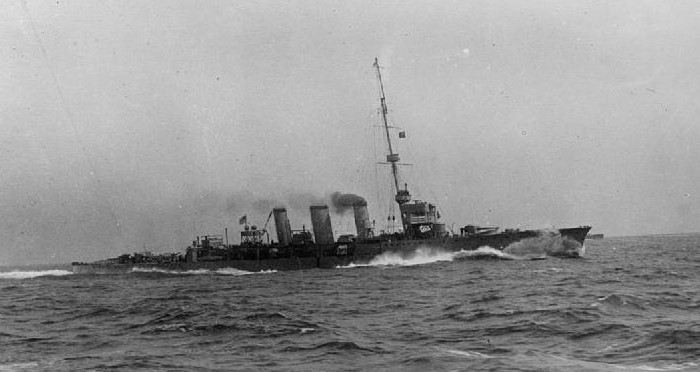
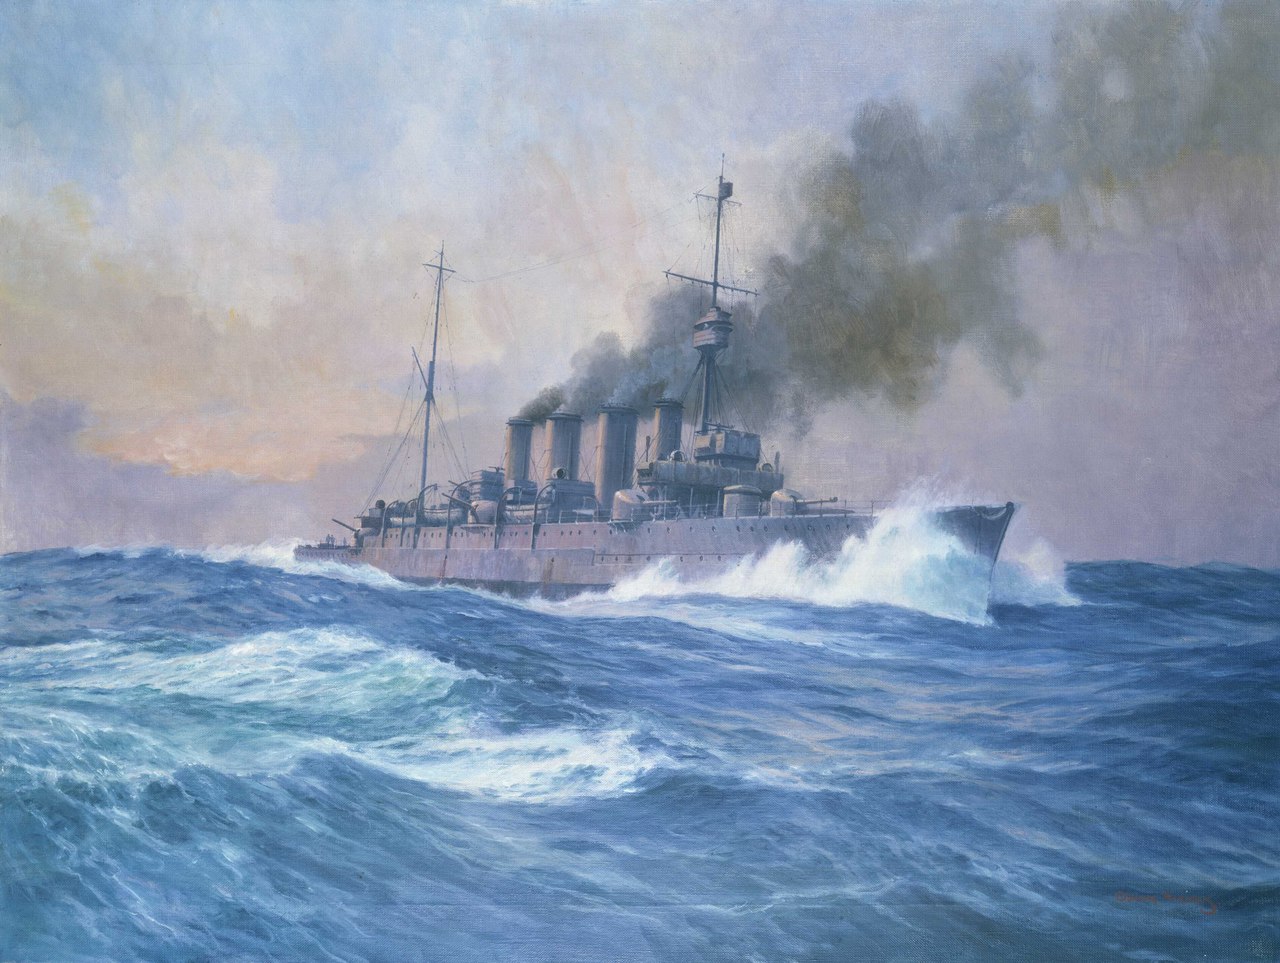
HMS Arethusa
The operation began on the morning of August 28th as Tyrwhitt saw shapes emerge out of the mist. They resolved into Goodenough's cruisers, who signaled that they knew the plan and were there to support Tyrwhitt. They would face nine modern torpedo boats, nine minesweepers, and four light cruisers, although one was obsolescent and two others were fairly weak. The backup forces were in the Wilhelmshaven, along with the ships of the High Seas Fleet, but the heavy ships were trapped inside the harbor by the tide, which was too low to let them pass the bar at the mouth of the Jade river until noon.
The battle began around 0700, when some of the British destroyers sighted German torpedo boat G194, and set off in pursuit. The Germans called for help, while Tyrwhitt followed his lead destroyers, afraid that his force would be scattered in the fog. The German ships made for the safety of Heligoland's guns, although several were badly battered by the British. Around 0800, two German cruisers finally appeared, and the British turned away. Fearless managed to drive Stettin off, but Arethusa, which had only arrived from the builders two days prior, was roughly handled by Frauenlob, taking at least 15 hits and engine damage that slowed her to as little as 5 kts.
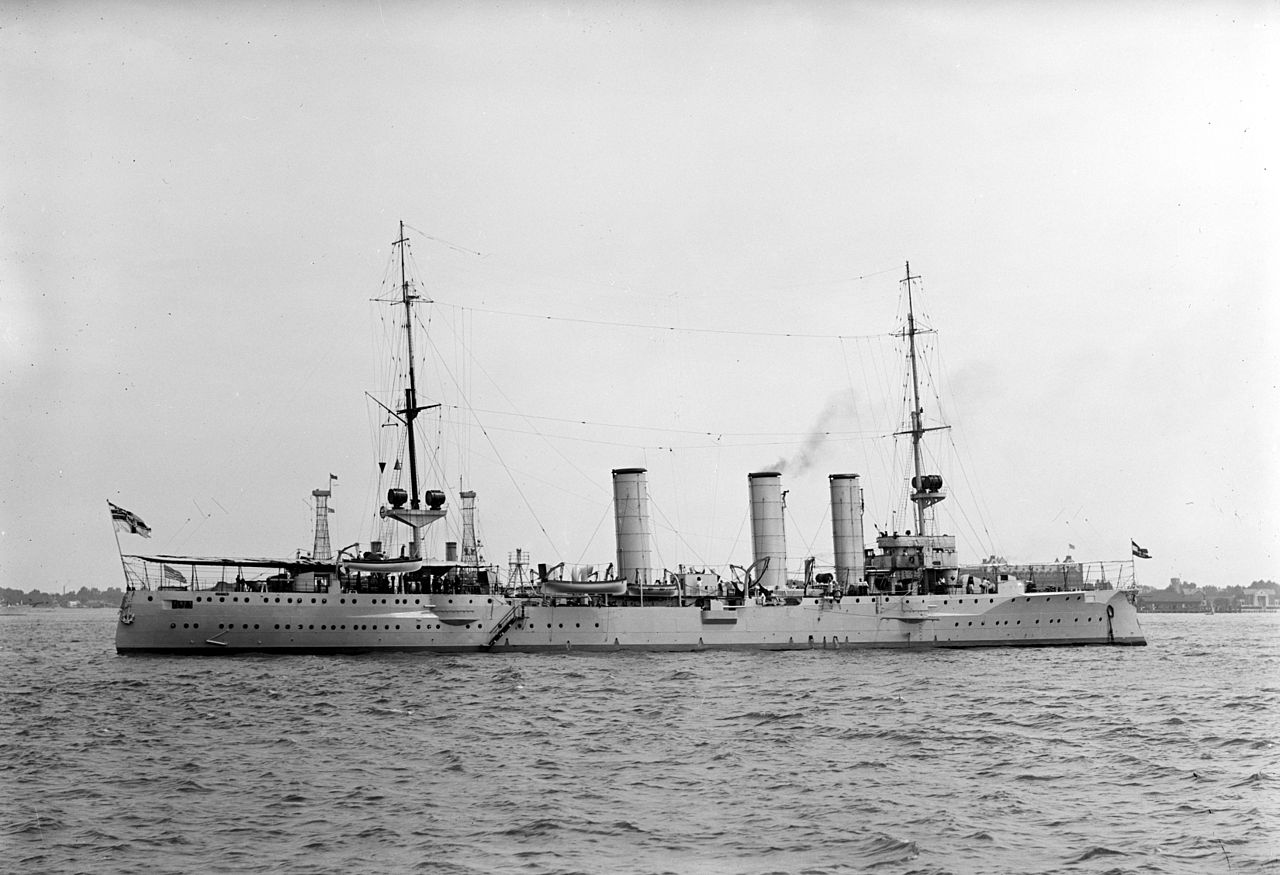
Stettin during a visit to the United States
Word of this reached Goodenough, and he detached two of his cruisers to aid Tyrwhitt. As they raced to the scene of the action, some units of the Harwhich Force spotted torpedo boat V187 and tried to run her down. She looked set to escape before Goodenough's cruisers stumbled across the pursuit, trapping the German ship and sending her to the bottom. As the British destroyers lowered boats to retrieve the survivors, Stettin, which had retreated to light all of her boilers, reappeared out of the mist. Neither side took much damage in the clash, but HMS Defender was forced to leave behind her boat, whose crew, along with a few prisoners, was later recovered by submarine E4.
To add to the confusion, Keyes, at sea aboard destroyer Lurcher,1 had spotted Goodenough's cruisers, but misidentified them as Germans, and broadcast their location. This forced Tyrwhitt to turn back east to avoid this new force, while Goodenough searched for his own vessels. His flagship, Southampton, was nearly attacked by HMSm E6, whose captain spotted the White Ensign moments before he would have launched his torpedoes. The crew of the cruiser spotted the periscope and made to ram, but the submarine dove quickly enough to avoid the attack. Finally, after over an hour, visibility improved enough for Keyes to correct his identification and call off the hunt.
Southampton, painted by the legendary Oscar Parkes
At last, all of the British ships were heading west, and Arethusa had managed to get up to 20 kts, leaving good prospects for a clean getaway. But these were dashed by the appearance of several German light cruisers, responding from deeper into the Bight. Fortunately for Harwich Force, the German cruisers were scattered, and the first one to appear, Strassburg, was driven off by Fearless and an attempted torpedo attack from the destroyers. Coln turned up soon after, although the British misidentified her as an armored cruiser, prompting Beatty to dispatch Goodenough to help, then follow himself after a few minutes of indecision, fearful of losing one of his ships to mines or the appearance of heavy German ships.2 Coln soon broke off and Strassburg reappeared out of the mist, trading fire with the British before another torpedo attack turned her back.
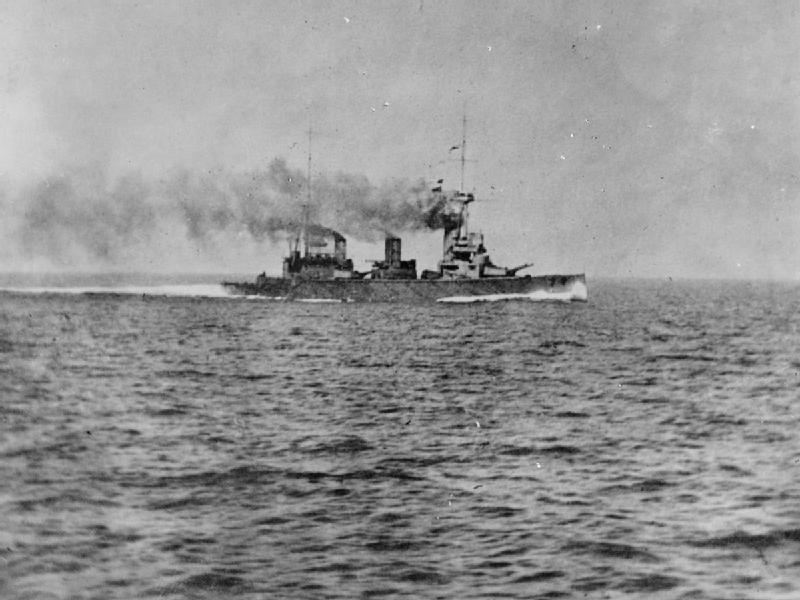
New Zealand at speed during the battle
The leading destroyers next encountered Mainz, and found themselves outmatched in the resulting gunnery duel. They turned to run, only to have the chase reversed when Goodenough's cruisers appeared. Southampton soon began to land hits, but Mainz disappeared into a fogbank before taking lethal damage. Her hopes of a clean escape were foiled when she ran into Tyrwhitt's main body, and Fearless made a hit on her rudder, leaving her circling slowly. The destroyers closed to torpedo the stricken cruiser, but the Germans had some fight left in them, badly damaging Laurel and Laertes. Their sacrifice wasn't in vain, and a torpedo hit the German cruiser, leaving her a sitting duck for every cruiser and destroyer in the British force. Eventually, her guns fell silent, and destroyer HMS Lurcher closed in to recover survivors, among them the son of Alfred von Tirpitz.
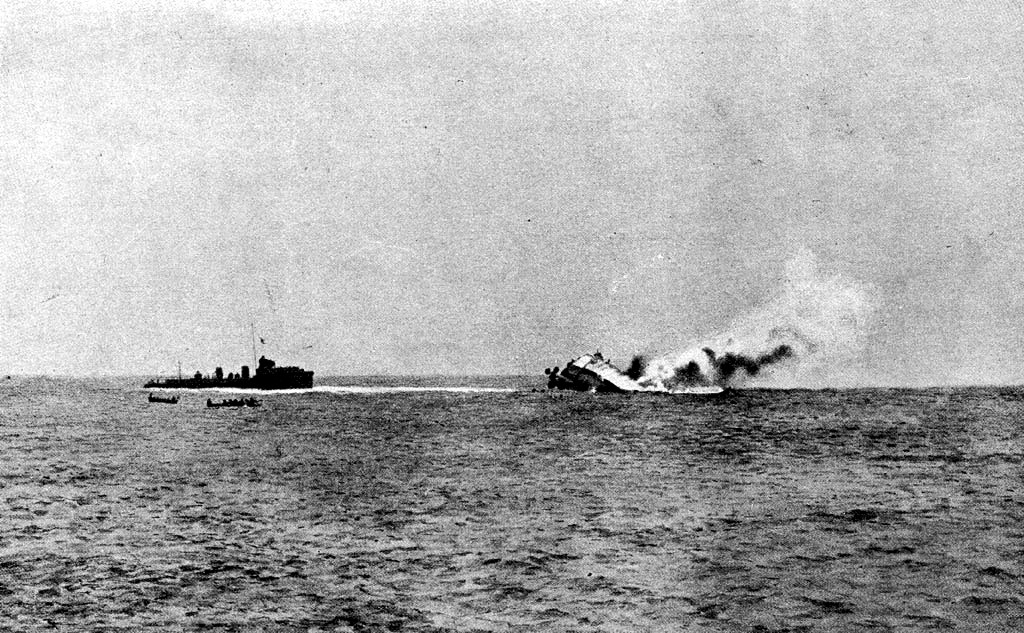
Mainz sinks as a British destroyer, probably Lurcher, stands by
But as Mainz sank, Strassburg and Coln appeared again, posing a serious threat to the Harwich Force's escape, particularly as Arethusa had been slowed again by her injuries and the destroyers scattered. Several turned to face the new threat, but they were saved by Beatty's perfectly-timed arrival. Strassburg quickly ducked back into the mist, but Coln began to take hits from the battlecruisers, and was reprieved only by the arrival of another German cruiser, Ariadne.
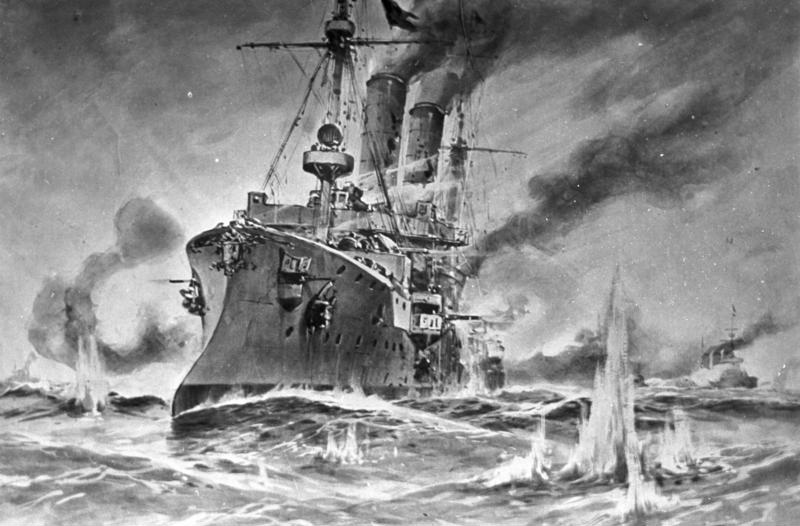
Ariadne under fire
She appeared out of the fog only three miles from Lion, and the British battlecruiser swiftly opened fire, 13.5" shells hitting home from the third salvo. The German cruisers was swiftly enveloped in flames, and Beatty turned west again. As he headed home, Coln blundered into his path, emerging even closer to the battlecruisers than Ariadne had. Despite the number of shell hits the cruiser took, her gunners got off 200 rounds at Lion, landing 5 hits that did only minor damage. She had slipped beneath the waves within 10 minutes, and although Beatty dispatched destroyers to search for survivors, they were sent to the wrong place, and ultimately only one man survived to be picked up two days later.
Coln
The clash with Coln was the last of the battle, as the other German light cruisers were either trying to avoid Beatty or to aid Ariadne, although she soon succumbed to the damage the battlecruisers had inflicted. The Germans had finally gotten their battlecruisers to sea, but they were under orders not to leave Heligoland Bight, and turned back when it became clear that the British had withdrawn. Tyrwhitt nursed his cripples home, arriving to a hero's welcome at a time when British forces were being pushed back on land.
While the Harwhich Force and the Grand Fleet would spend the next four years in combat with the Germans, they would never again venture so deep into German waters. The Germans soon laid extensive minefields, making a direct attack on the Heligoland Bight far too dangerous. The bigger effect was on German thinking. The Kaiser was terrified that his precious battlefleet would share the fate of the cruisers, and ordered that it was not to try and fight a fleet action without his permission. It would be almost two years before he consented to such an attempt.
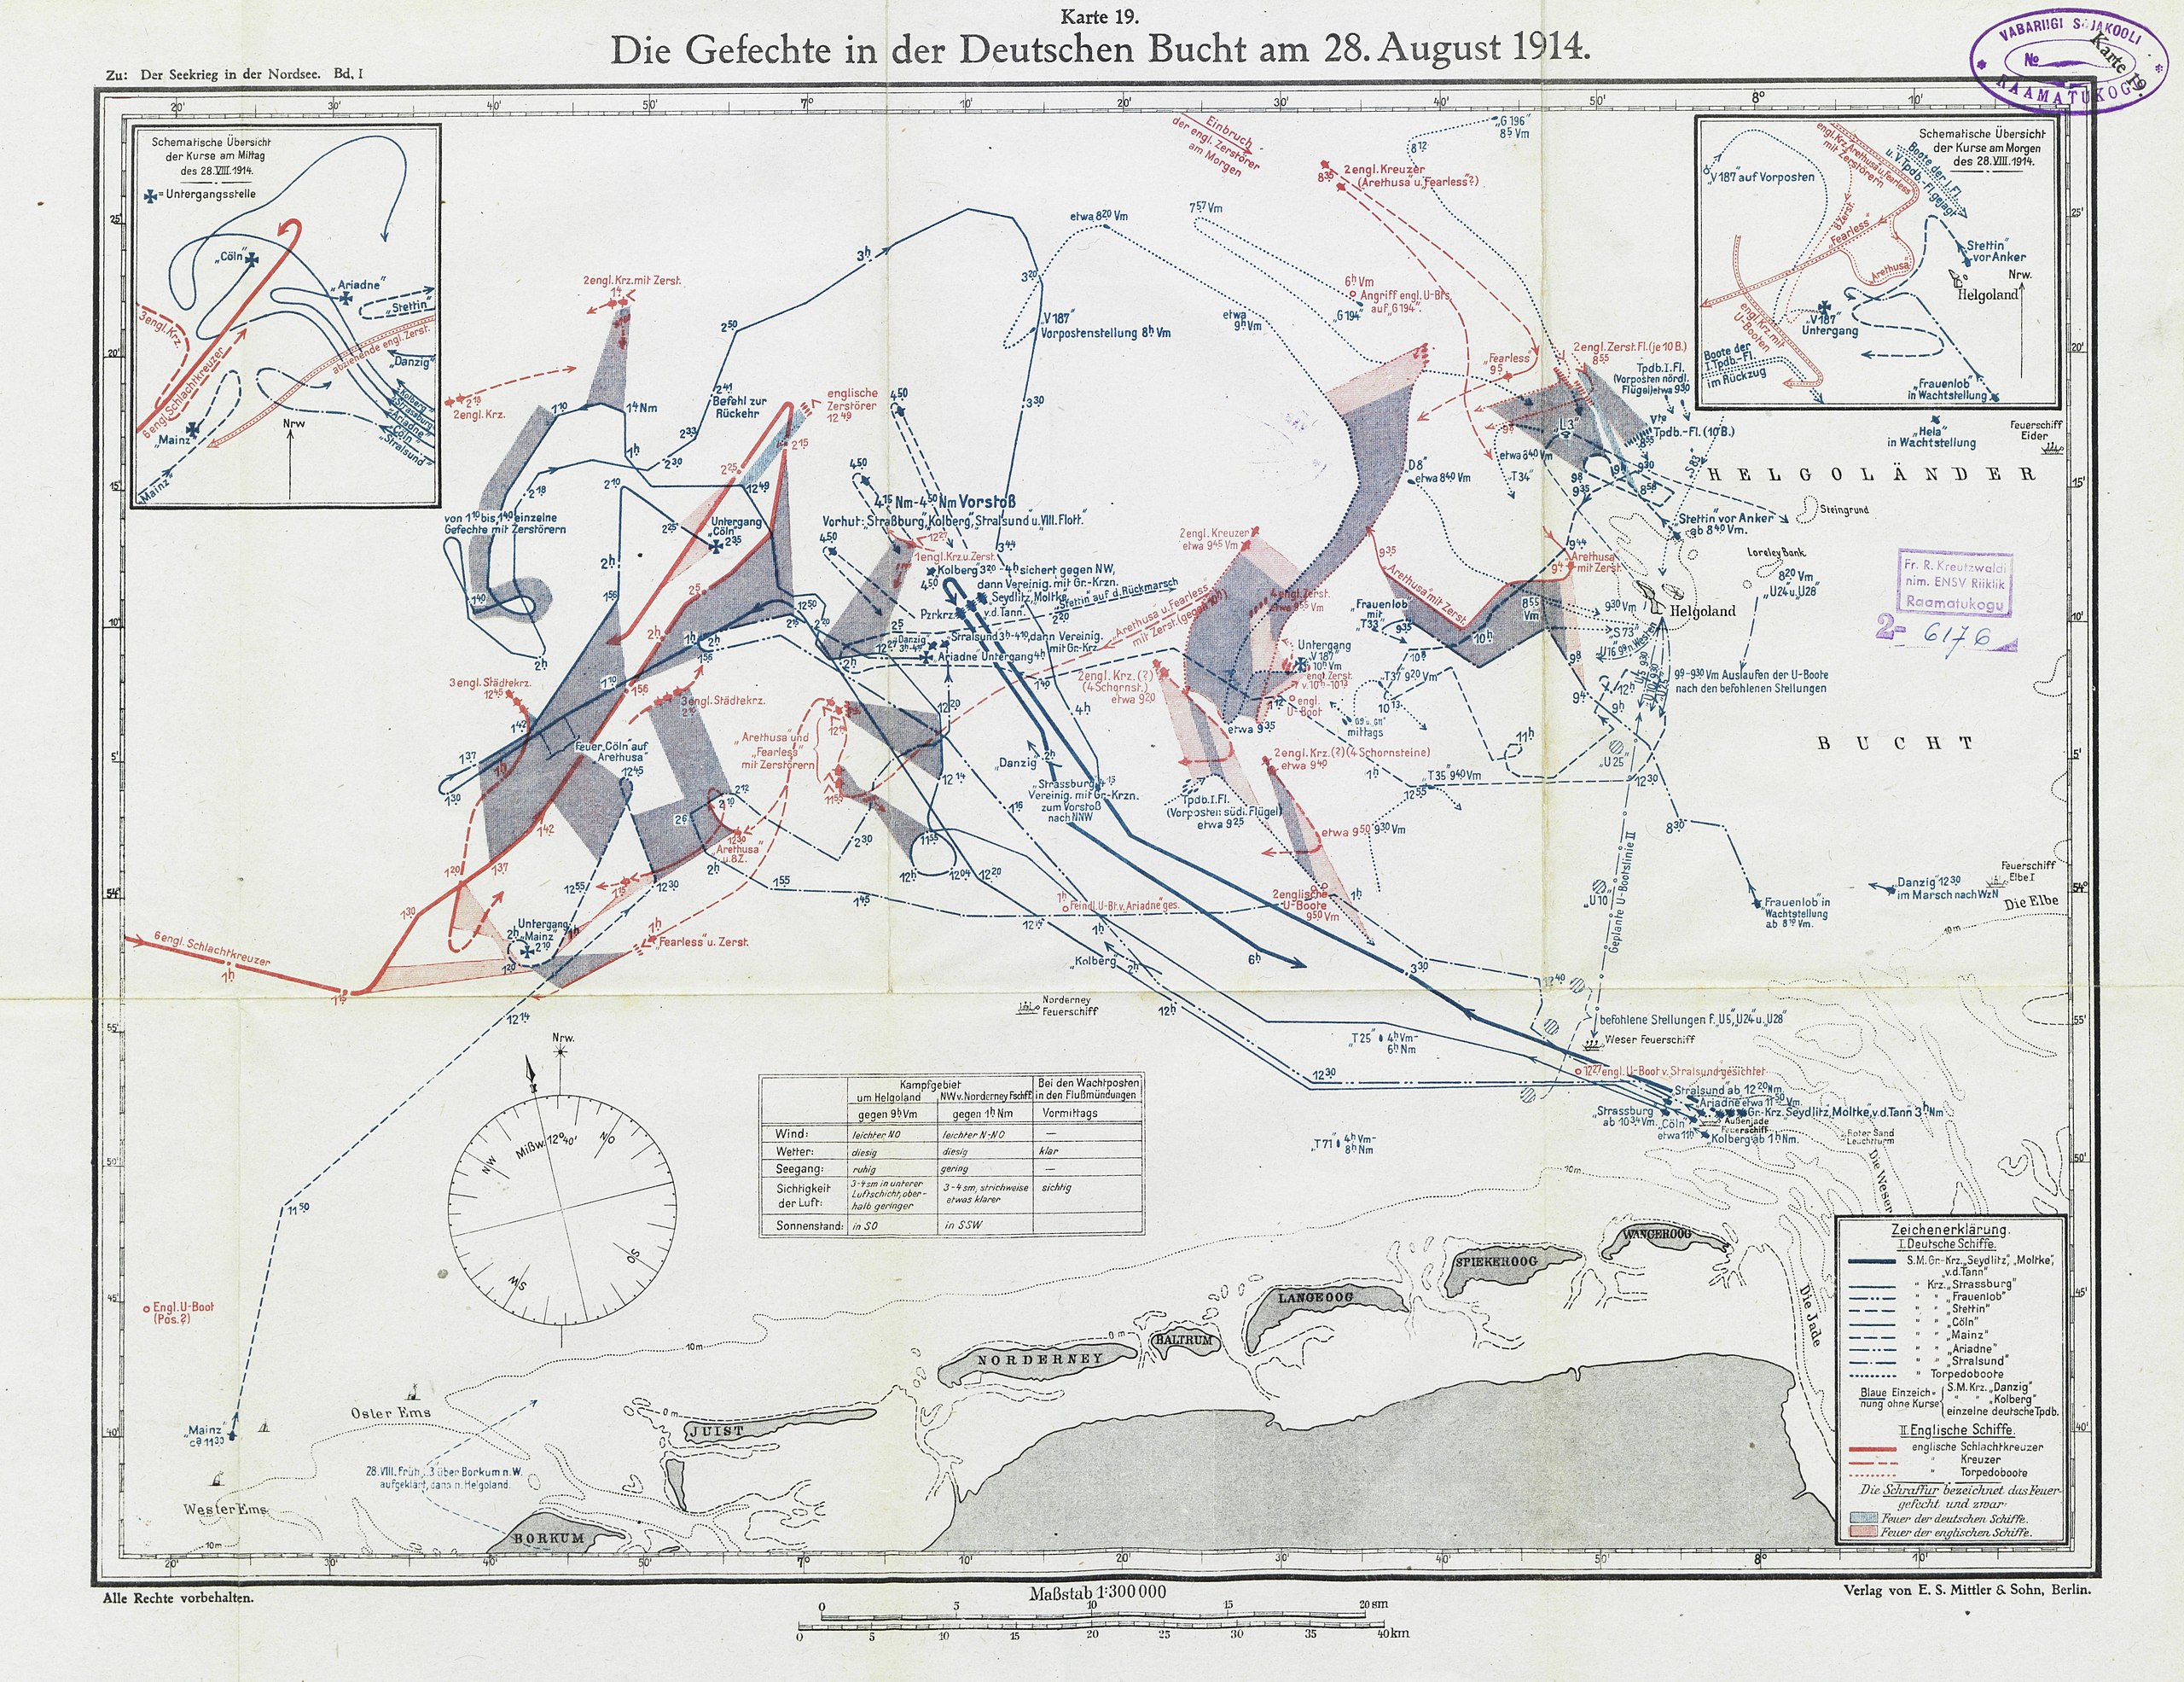
A German trackchart of the battle
The battle also provided valuable lessons for both sides. The Germans were reminded of the importance of concentration, and of keeping defensive forces on standby. For the rest of the war, at least four capital ships would be anchored outside the Jade bar in case of another British raid, and the rest of the fleet would be able to raise steam with two hours notice. The British emphasized the importance of good planning and communication pre-battle, given the near-disastrous encounter between Southampton and E6, as well as taking the first steps to figure out how to effectively use radio in battle. They would have the chance to refine this system over the next few months, as the action at Heligoland Bight was followed by others across the North Sea.
Comments
The opacity of the fog of war is remarkable, and more than I would have expected.
On a separate note, every time I hear about
the Bight' my mind jumps toA Fire Upon the Deep' and wonders how evil AI gods showed up in 1914...(yes yes, I know thats the BLight, but still...)Given the friendly fire potential with submarines, did anyone ever try to use something like flare codes as an emergency IFF? "Green red green" means that sub you started turning to ram is friendly, that kind of thing.
Everyone in WWI seems to have wanted to lure the enemy onto a line of submarines. Was it a good idea that never panned out, or just wishful thinking?
A little of both. Capital ships were very vulnerable to torpedo attacks if a submarine or destroyer could get in range in a situation where the big ships couldn't easily evade the torpedoes by turning away (*), so a successful submarine ambush could be devastating. The problem is that due to limitations of subs of that era, it's really hard to successfully ambush an alert for.
(*) Torpedoes if that era were unguided, had relatively short ranges, weren't much faster than then-modern warships, and left highly visible trails of bubbles in their wakes. This combined to make them relatively easy to evade under most circumstances: the targeted ships turn away upon spotting the torpedoes, opening up the range (making a hit less likely by opening bigger gaps between torpedos in a salvo, and potentially getting out of range completely) and presenting a smaller cross section target. But ships could still be sunk if the torpedoes were launched from ambush at short range (c.f. the Action of 22 Sept 1914, where one German sub sunk three British Armoured Cruisers it had caught unawares in a chance meeting engagement), or in a night action with limited visibility, or in a raid on an underdefended port where the big ships didn't have room to turn away.
Both sides based their fleets with the specific idea of protecting them from submarine ambushes and night raids by destroyers, and the British in particular aggressively patrolled the approaches to their ports. So in order to successfully lure a fleet across an ambush line, you need to place the ambush line inconveniently far away from the port, requiring the enemy to cooperate with your battle plan by following the route you expect: the sea is a big place, and the odds of guessing the route get worse the further you are from the immediate approaches of the port.
It also helps if the enemy isn't intercepting and decrypting your radio messages, as the British were to the Germans throughout the war. It's hard to sneak up on someone who's reading your mail.
Bottom line, submarine ambush lines were very hard to pull off against an alert for, but the potential payoff was big enough that it was worth trying. Particularly for the Germans, who had little to no hope in a stand-up capital ship fight (except perhaps for a small window in late 1914), but who could practically win the war in an afternoon if they somehow managed to get naval superiority in the North Sea. Successfully luring a battle squadron or two over a submarine ambush line wouldn't be enough to do that by itself, but it would be a huge step in that direction.
Huh, I didn't know that submarines had a different prefix than surface ships.
They must. After all, they are boats not ships.
Though it is common to write 'His Majesty's Submarine' as HMS.
As Eric mentioned, with hindsight the Germans should have gone all out for a fleet engagement in 1914, when the gap was smallest between the fleets, and especially before the 15" ships become available. After all, if the HSF is destroyed it makes very little difference to the German effort, but a big victory could break the blockade or even interfere with channel crossings.
@Echo
I'm sure someone tried. Those sorts of things can easily go wrong in practice.
@beleester
During this time period, the standard prefix was HMSm. At some point (I think during the interwar years), submarines essentially began using the HMS prefix instead.
@eric
As an aside, would newer ships have actually prevented what happened to the live bait squadron? I always wondered how much the specs of the ships affected the outcome, vs training and luck.
It sure looks like the battle cruiser concept worked well in this battle. Although that picture of the New Zealand really puts into perspective how awful a mast behind the funnels would be at speed.
Newer ships might have helped a somewhat. Survivability wise, I'm not sure how much better (if any) underwater protection and internal compartments were in late prewar cruisers compared to the Cressy class, but I suspect it would have been at most an incremental improvement.
Any then-current cruiser design would have been considerably faster than the live bait squadron, something like 4-8 knots faster in designed speed, and newer ships generally operated closer to their designed speed as older boilers suffered degraded performance from fouling and other wear and tear. This would have made them better able to dodge torpedoes (which I don't think the live bait squadron tried) or ram the submarine (which was tried unsuccessfully).
Another advantage would be that newer ships would have put a lot fewer crewman and a lot less tonnage of warship at hazard for the same combat effectiveness.
As you say, training and luck were probably bigger factors. The ships being crewed by raw reservists almost certainly contributed to the failure to spot the sub or the torpedo tracks until it was too late, as well as the fatal mistake of thinking the first torpedo was a mine.