
In 1956, Egyptian dictator Gamal Abdel Nasser nationalized the Suez Canal, imperiling European access to oil and humiliating Britain and France, who had previously controlled it. Diplomatic efforts to solve the crisis failed, and the two nations came up with a plan to recapture it by force in cooperation with Israel, who hoped to preempt an Egyptian attack. Israel would invade the Sinai, and the two powers would issue an ultimatum for both sides to withdraw from Suez. When Nasser refused, they would have their pretext for an attack.
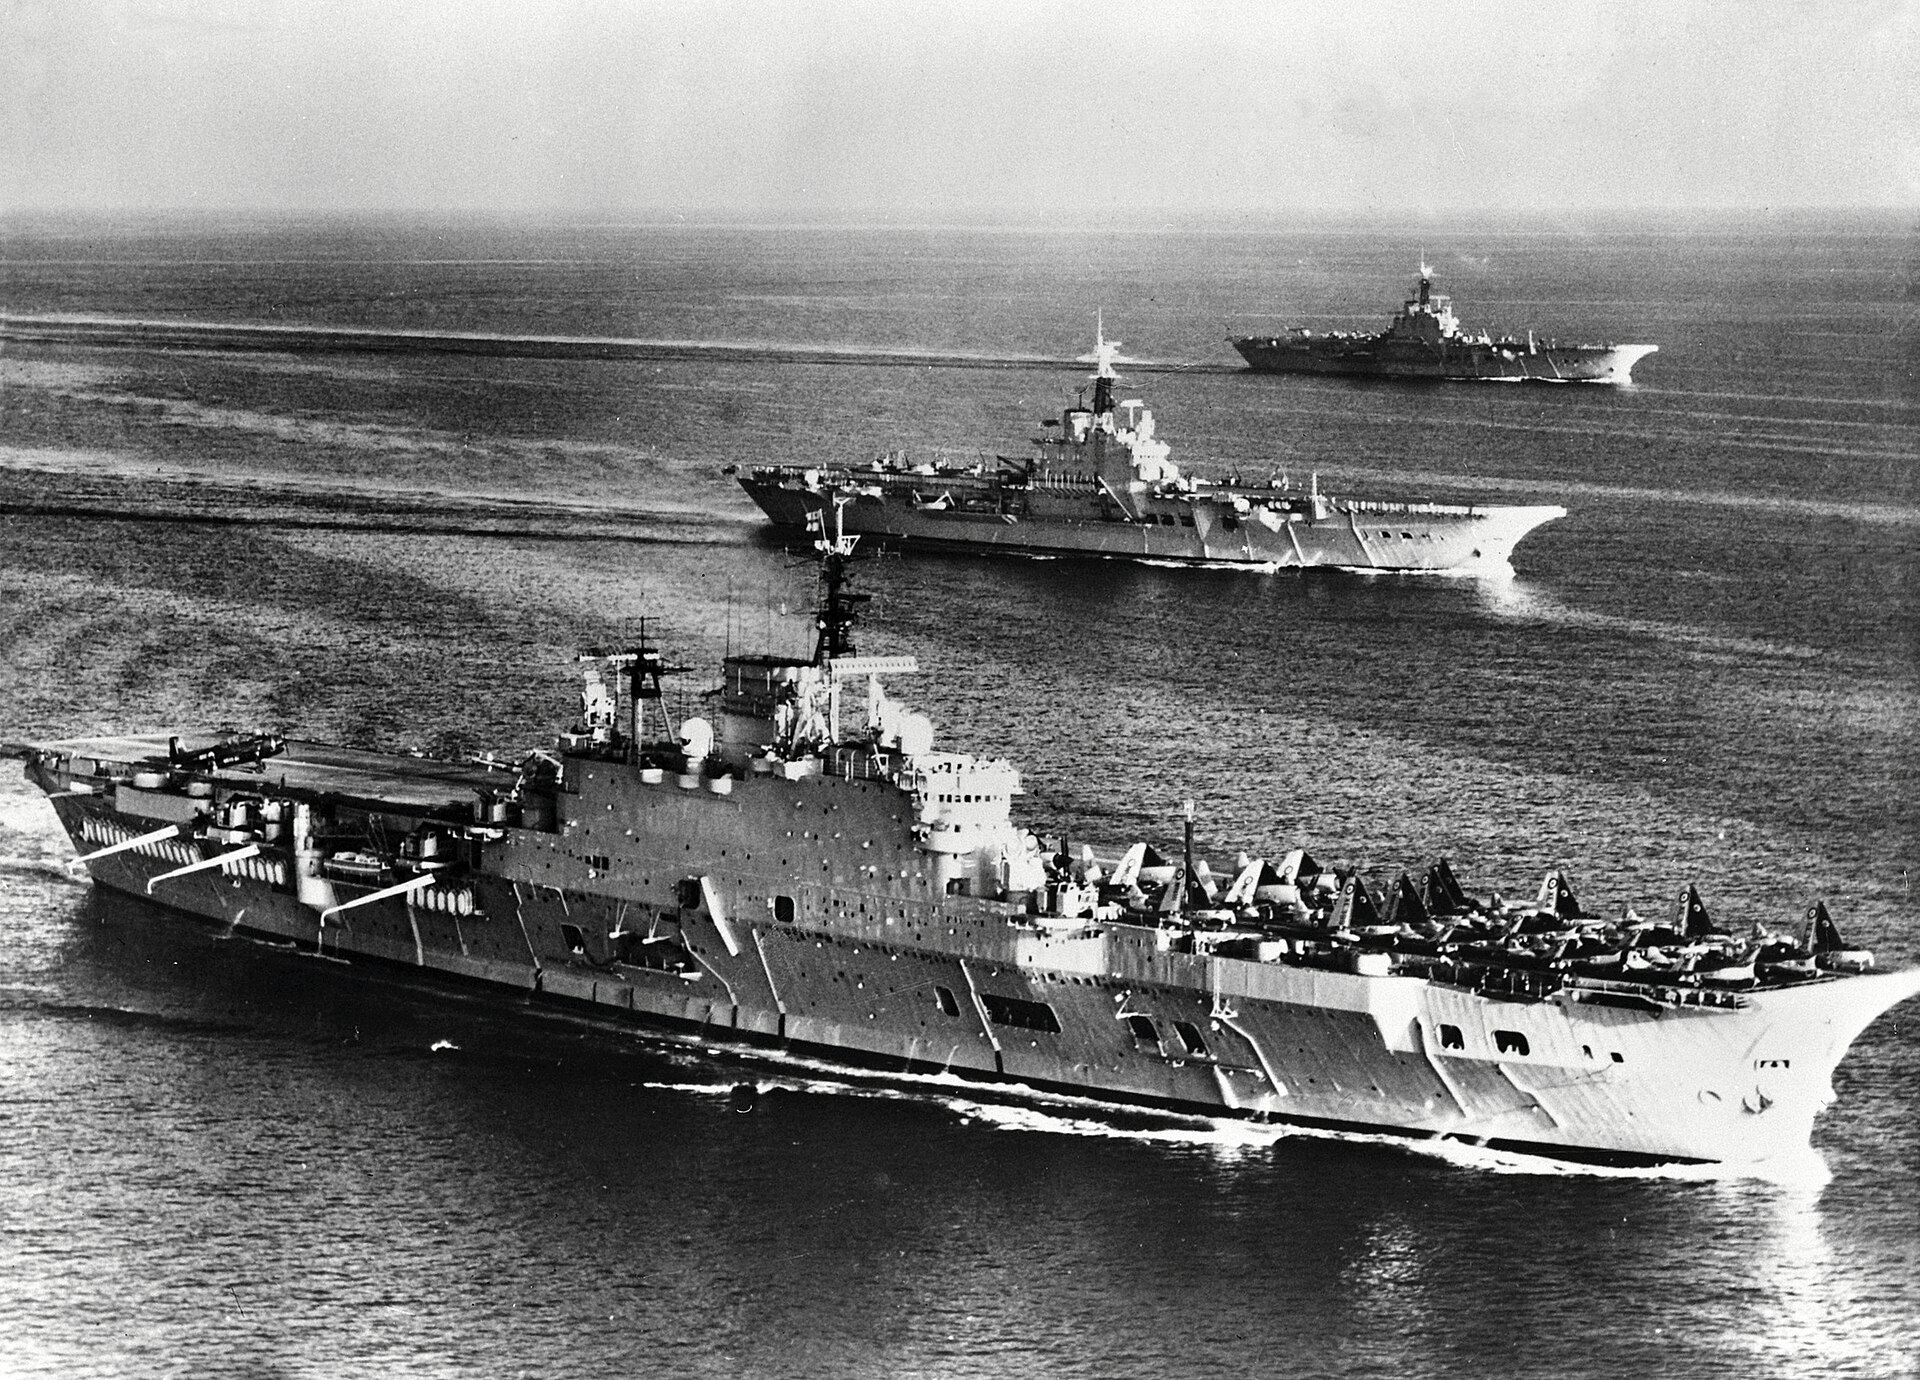
Eagle, Albion and Bulwark together
The Israeli invasion kicked off on October 29th, and Britain and France quickly issued their directive for both sides to withdraw. As expected, Nasser was entirely unwilling to suffer the humiliation of backing down in the face of Egypt's former colonial overlord, allowing the military plan to go into effect. Unfortunately, the plan was rather hindered by the lack of bases. While Britain had extensive bases in Cyprus, there was no harbor on the island suitable for the invasion force to assemble, forcing them to stage out of Malta, about four days steaming from Egypt.
This gave several days for air power to wear down the Egyptians before the ground forces arrived, with the primary punch split between RAF Canberra and Valiant bombers flying out of Cyprus and Malta and planes operating off the British and French carriers in the eastern Mediterranean.1 When the crisis started, only HMS Eagle was in the Med, but she was soon joined by Albion and Bulwark, as well as French carriers La Fayette and Arromanches. While the French carriers were equipped surplus American planes from WWII, 36 Corsairs on Arromanches and 18 Avengers on La Fayette, the British had modernized their carrier forces. Eagle carried 9 Wyvern attack aircraft, 17 Sea Venom all-weather fighters and 24 Sea Hawk fighters, while the smaller Bulwark had an all-Sea Hawk group of 33 aircraft and her sister Albion was split between 23 Sea Hawks and 9 Sea Venoms.
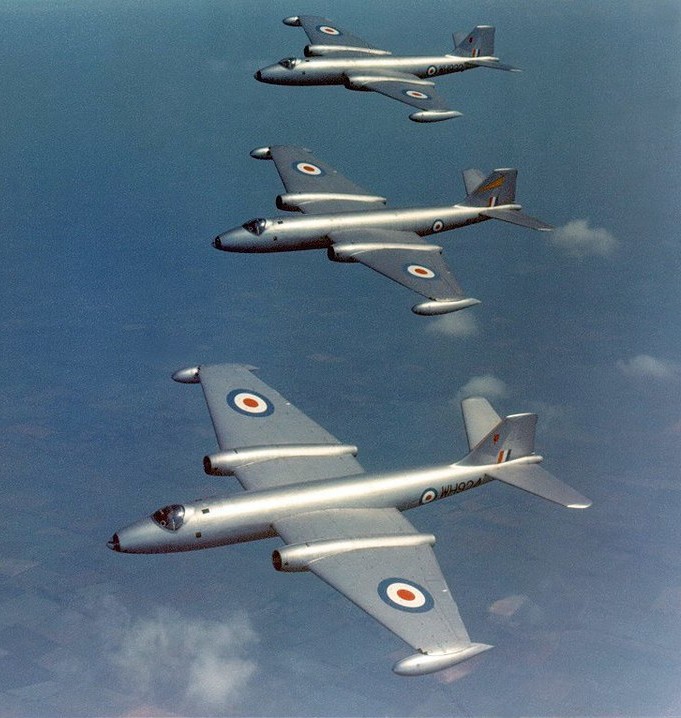
Canberras in flight
The ultimatum expired early on the morning of October 31st, and for a while, there was discussion of striking first during daylight, but fear of Egyptian/Soviet counterattacks on the British bases on Cyprus meant that the attacks were delayed until that evening. Even this delay wasn't enough to get the British forces in the field ahead of events. The bomber crews hadn't been sure if they would be attacking Israel or Egypt until the previous day, greatly limiting their ability to analyze and learn their targets. And in a moment of the odd comedy that so often accompanies war, the ground crews for the Malta-based Valiants had to break down the gate of the bomb dump to get the weapons for their aircraft because the base commander hadn't been told that a war was about to start. The comedy continued after the first wave, targeted at Cairo West airfield, was already on the way to the target. The British learned that the US was running its civilian evacuation near Cairo West, and as American casualties would obviously do grave damage to their diplomatic efforts, the bombers were recalled. The result was chaos at Malta as the returning aircraft tried to land while the second wave was taking off for the hasty replacement target, Almaza. To make matters worse, the pathfinders for the redirected attack mistook Cairo International for Almaza. The British after-action report pointed out that while Cairo International was home to some of Egypt's Soviet-built aircraft, none of them were actually damaged during the raid. Subsequent night-bombing raids were more successful in finding their targets, but had little more effect on the airplanes that were the goal of the initial attack.
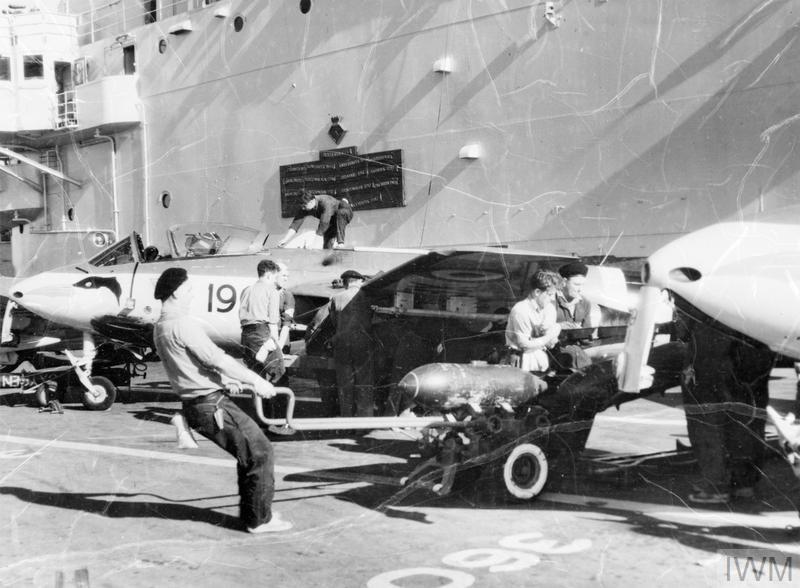
A Sea Hawk is armed aboard Eagle
But dawn on the 1st brought the arrival of tactical aircraft from the carriers, as well as British Venoms and French Thunderstreaks and Mysteres from bases in Cyprus and Israel. Thanks to careful preparation2 and the use of cannons and rockets in shallow dives, they were far more effective than the bombers had been. Careful planning was employed to make sure that every plane was over the target as quickly as possible to give the defenders little warning, and second passes were avoided if at all possible, as they greatly increased the chances of being shot down. If one had to be made, it would be from a different direction than the first pass to make the defender's lives harder.3 The planes withdrew on the deck, often flying so low that AA guns couldn't depress enough to engage them effectively, and none were lost that day. Opposition in the air was nonexistent. Nasser had ordered his fighters to stand down, as he believed the British and French would be forced to withdraw in a few months, and he would need the pilots, and what planes could be evacuated to remote strips, for his long-term campaign against the Israelis.
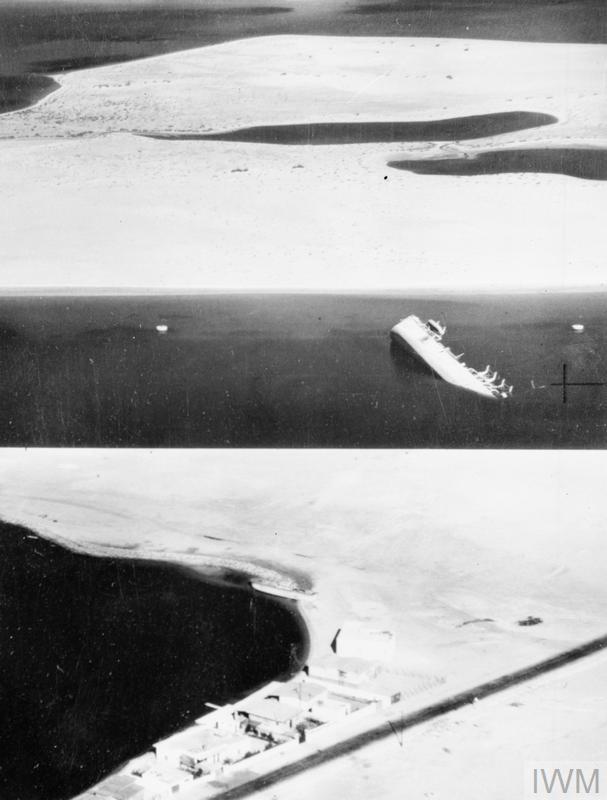
The blockship sunk in the canal
Strikes against the airfields from both land bases and the carriers continued throughout the day on the 1st, and while they were resumed early on the 2nd, it soon became apparent that the Egyptian Air Force had been essentially wiped out, and the air campaign moved onto its second phase, attacking various targets in an attempt to soften things up for the upcoming landing. These ranged from a blockship the Egyptians had positioned to close the Canal to depots full of military equipment to truck convoys on the roads west of Cairo. Civilian targets were entirely off-limits, preventing the tug slated to move the blockship from being sunk and allowing the Egyptians to seal off the Canal, and the defenders rapidly realized that parking a military truck between two cars made it safe from marauding fighters. On the 3rd, a major effort was made against the Gamil Bridge, which connected Port Said to the rest of Egypt. Initial dive-bombing attacks were ineffective, and an alternative method, using a low-level attacks with delayed-action bombs, was used. This was dangerous for the attacking aircraft, and a Wyvern from Eagle was badly damaged during one of these attacks, with the pilot ejecting three miles out to sea and being picked up by a Whirlwind helicopter after some Sea Hawks dissuaded Egyptian defenses ashore from interfering with the rescue.

The Sea Venom makes a wheels-up landing on Eagle
The Wyvern was not the only aircraft to take ground fire on the 3rd. A Sea Venom from Eagle was also hit, and while the aircraft did make it back to the carrier, damage to the hydraulic system meant that the landing gear couldn't be lowered. Despite this, the pilot made a safe landing, although his observer was injured badly enough by the ground fire that his leg had to be amputated. The next day, Eagle withdrew to replenish, and the remaining air effort shifted to focus even more tightly on tactical targets in support of the landings the next day. One of these early strikes saw a Sea Hawk off Albion hit, with AA fire shattering its canopy, while a second suffered a serious bird strike coming off the target. Both pilots were able to make it back safely, but it was an illustration of the dangers of low-level attacks. The land-based aircraft had similar experiences, with one of the Venoms returning to Cyprus from a strafing mission with a piece of truck axle embedded in its wing. But at the end of the day on the 4th, the air effort had done enough damage that the invasion moved onto the next phase, actually landing troops in Egypt, which we will pick up next time.
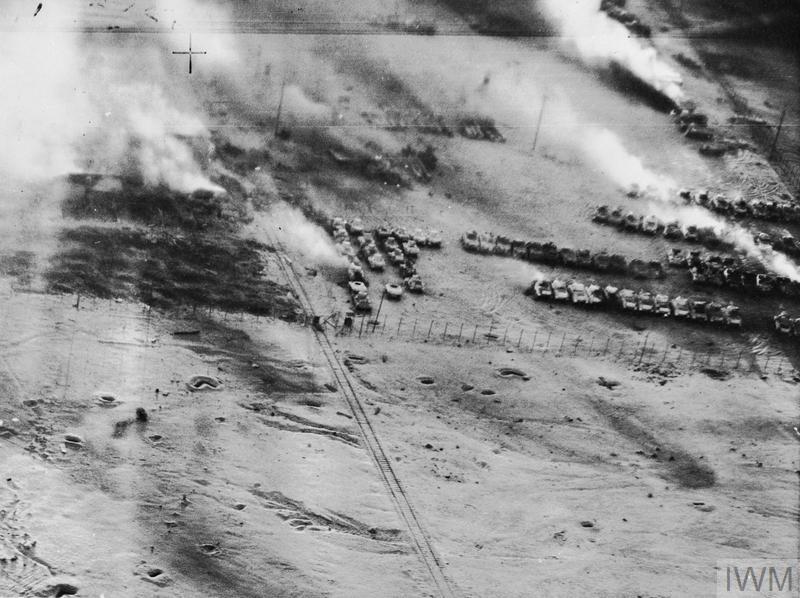
Tanks burn after an air attack
But before we move on to the landings, it's worth spending a brief moment on the Anglo-French effort to secure control of the sea during the opening days of their intervention. The French carriers appear to have taken responsibility for flying sweeps over the Med, most likely because the British jets were faster and thus less vulnerable to ground fire. Their only encounter with the Egyptians came early on the 1st, when they found a destroyer and a frigate, but the Corsairs were ordered to bomb from 8000', far too high for any sort of accuracy. The Egyptians got the message and ran for port, although on the 2nd, Corsairs attacked a "Motor Torpedo Boat" with rockets that was later discovered to be the French submarine Creole, which sunk itself before they could damage it. More interference came from the US 6th Fleet, which was operating nearby, and whose aircraft frequently forced the British carriers to launch interceptors. This was extremely irritating, as the ships had to clear their decks and turn into the wind for both launch and recovery, a procedure that interfered with the ability to get strike packages in the air.
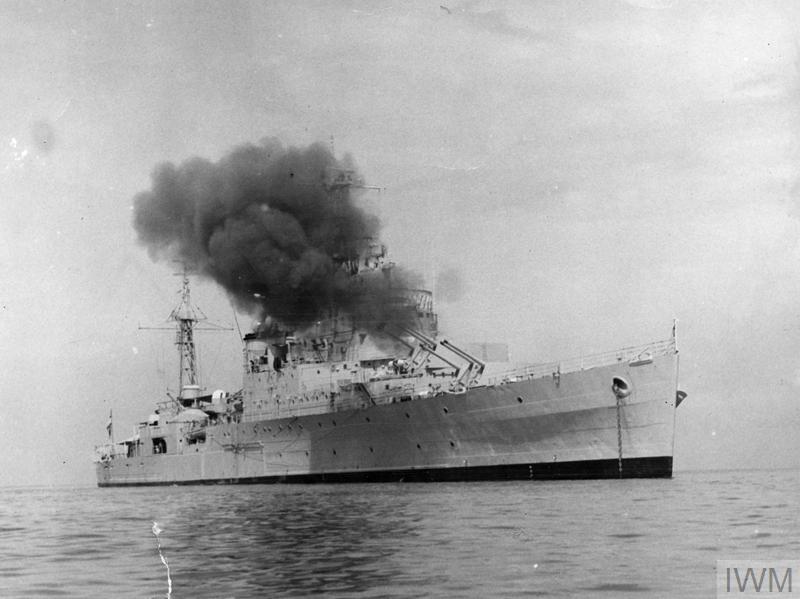
HMS Newfoundland bombarding shore targets in Malaya, 1955
Slightly more consequential was an action in the early hours of the 1st. A British force composed of cruiser Newfoundland and destroyer Diana was sent into the Gulf of Suez, just south of the Canal, to deal with any Egyptian warships in the area. Ship traffic in the area was heavy, but shortly after 0100, the crew of Newfoundland spotted a darkened vessel heading south. The two ships turned to follow, and Newfoundland used her signal light to reveal the vessel as a River class frigate, three of which the British had transferred to Egypt a few years previously. The Egyptian ship, Domiat, was ordered to stop, but her crew opened the throttle and trained her weapons, a pair of 4" guns and some AA armament, on Newfoundland. The cruiser's crew responded the only way possible, opening fire with 6", 4" and 40 mm batteries. The range was only 1,400 yds, and every 6" salvo landed at least one hit on the frigate. The Egyptians fought back bravely, landing two 4" hits on the cruiser. One hit the superstructure and detonated in the cinema, killing a Chinese civilian onboard as a tailor, while the other blew a hole in the pay office and lightly wounded another Chinese civilian, this one working in the nearby canteen. An apparent attempt to ram the cruiser brought Diana into the battle, but the valor of the Egyptians was to no avail. Within 5 minutes, Domiat was ablaze, and she rapidly rolled over and sank. Diana fished 72 survivors out of the water, although two succumbed to their wounds.
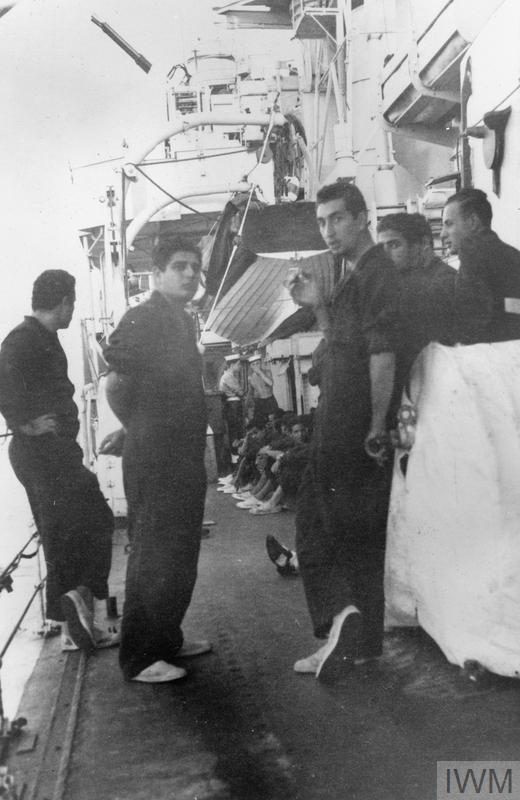
Survivors from Domiat aboard Diana
The rest of the war was quiet for Newfoundland, the only excitement coming a few days later with what was believed at the time to be Egyptian torpedo boats and is now thought to have been a radar mirage created by anomalous propagation.
1 The carrier group was commanded by the hilariously-named Vice Admiral Manley Power. ⇑
2 The carriers had spent the weeks leading up to the war training their air groups not only in skills like strafing and rocket attacks, but also the underappreciated but vital tasks like joining up swiftly and safely after a night launch. ⇑
3 Of course, when planes from Albion found an entirely undefended airfield full of Egyptian trainers, they strafed until shortages of ammo or fuel forced them to withdraw. ⇑
Comments
When you say "sunk itself" here, do you mean submerged? Sunk sounds to me like it was sent to the bottom, but AFAICT that wasn't the case.
And if it did manage to sink itself, that sounds like a story I want to hear anyway!
What are the arms coming out of the rear port side of the nearest carrier in the top photo? They look almost like torpedo net arms, particularly given that there appear to be similar arms stowed further forward, but I’m surprised they would have those deployed when underway.
Something to do with a crash boat if a plane ditched maybe?
Starboard side. You can’t see any of the port sides
@BR
It's a joke about submerging.
@redRover
Those are antennas.
How did that happen?
I'd guess the truck blew up and threw the axle into the air, and the Venom hit it. But maybe they were flying really, really low.
@bean
Makes sense! I hadn't thought of that, though I suppose for pre-satellite communications you need much larger antenna arrays. Did the carriers double as flag ships and handle most of the long-distance communication with London themselves, or was it routed via communication ships/intermediaries?
In reading about the USS Blue Ridge, it seems like the USN moved a decent amount of that off to a dedicated platform, at least for the amphibious groups.
It was generally done by the carriers themselves. The US looked at using other ships when we thought we'd have to go to flush decks, but that ultimately died off, and the British never considered it because they couldn't afford it.
Have to keep remembering that those were made of wood.