
In early April 1982, Argentina invaded the Falkland Islands, a few desolate rocks in the South Atlantic. The British mobilized their fleet in response. After a fierce battle in the air and at sea, the British gained the upper hand, and began landing troops on May 21st at San Carlos Water on the west coast of East Falkland. The Argentinians attempted to defeat the invasion with air attacks, but the British eventually gained the upper hand. On the 28th, the British began the ground campaign, defeating the Argentinian garrison at Goose Green and opening the way to lay siege to the main enemy positions near Stanley. The first days of June saw the islands shrouded in clouds, but that didn't prevent the British from leapfrogging forward to Fitzroy and Bluff Cove, just to the south of Stanley. There, tragedy struck on June 8th, when an air attack caught several ships unloading. This didn't stop the British from launching their assault on the hills surrounding Stanley on the night of the 11th, securing three major hills. The final assault was scheduled for the 13th.1
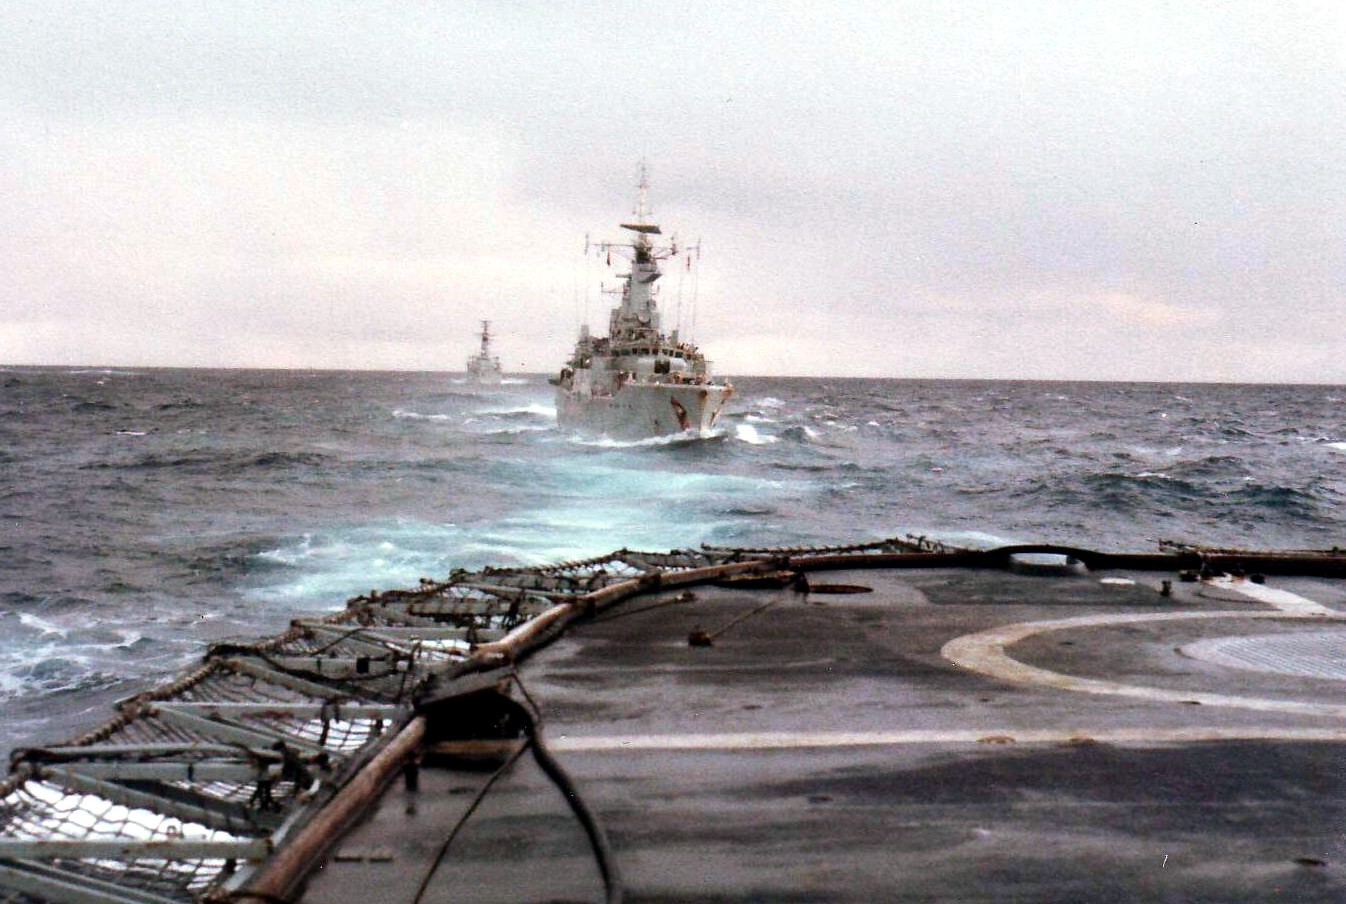
Yarmouth and Andromeda seen from Cardiff
The 12th was fairly quiet, with the usual shuffle of ships between San Carlos and the transport area. Exeter, after nearly two weeks guarding San Carlos, was swapped with Cardiff, from the Battle Group screen. Argentine air activity was minimal, with only a transport flight after dark, which the British failed to interdict with their artillery. The most notable event took place thousands of miles away, when transport Norland reached Montevideo and landed over a thousand Argentinian prisoners, who were repatriated across the River Plate by the Red Cross. Even as this was going on, dispatch ship Hecla set off from the Falklands for Montevideo with wounded. Only two frigates, Active and Arrow carried out the nightly bombardment, with Arrow firing the last 103 rounds of 902 she had fired since entering the war zone. She and Yarmouth were the only undamaged survivors of the original escort group, a testament to the brutal attacks the British had endured.
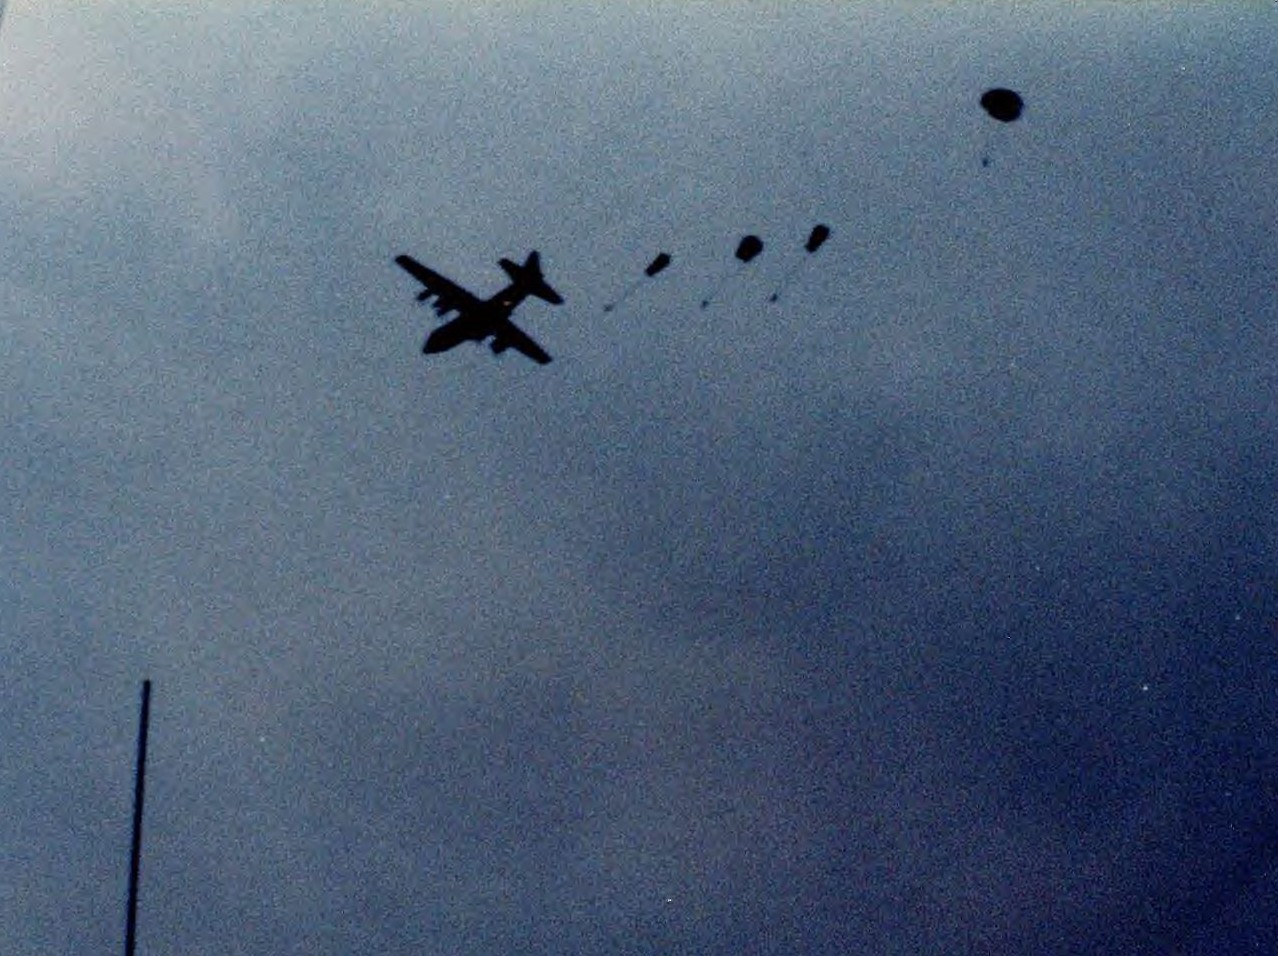
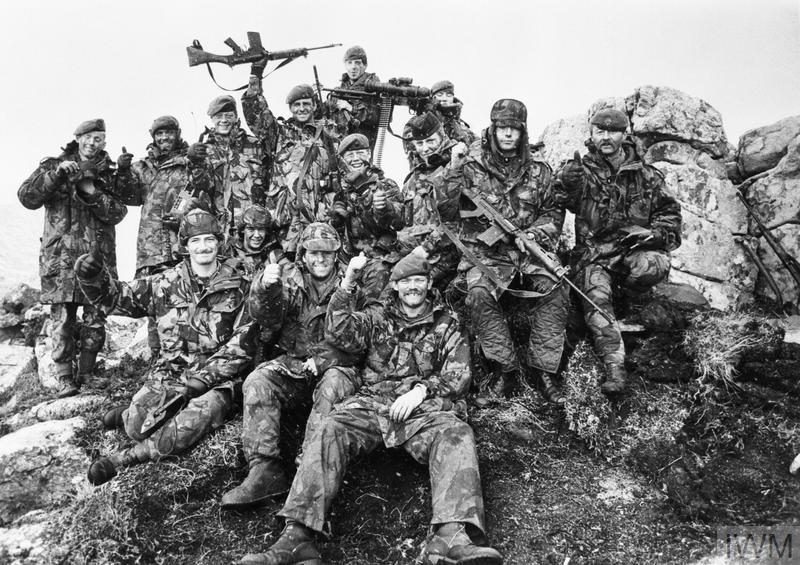
Replacement personnel parachute to a ship off the Falklands
The 13th was somewhat more exciting. At sea, the regular airdrop by a Hercules flying out of Ascension went wrong when the parachutes on several of the cargo bundles failed to open, narrowly missing frigate Andromeda. Fortunately, none of the 22 passengers who also jumped had similar problems, and they were all fished out of the ocean safely. Repair ship Stena Seaspread finally finished patching up Plymouth and sent her back to the battlegroup, then began work on Glamorgan. Argentina put up one last air raid. Even though Cardiff picked up a raid of 7 Skyhawks before they went to low level, they managed to evade the CAP and bored in on their target, the 3 Commando Brigade HQ near Mount Kent. Fortunately for the British commanders, who were having a meeting at the time, the majority of the bombs failed to go off, and the only serious damage was to a couple of helicopters parked nearby. As they withdrew, the Skyhawks encountered the helicopters ferrying supplies from Teal Inlet to Mount Kent. One Wessex was attacked by a Skyhawk that attempted to "bomb" it with a drop tank, while a Sea King found itself the target of a quartet of the jets. Its pilot managed to evade several passes, but took a 20mm hit on a rotor blade and was forced to land. A spare was flown out, and the aircraft was operational again within an hour.
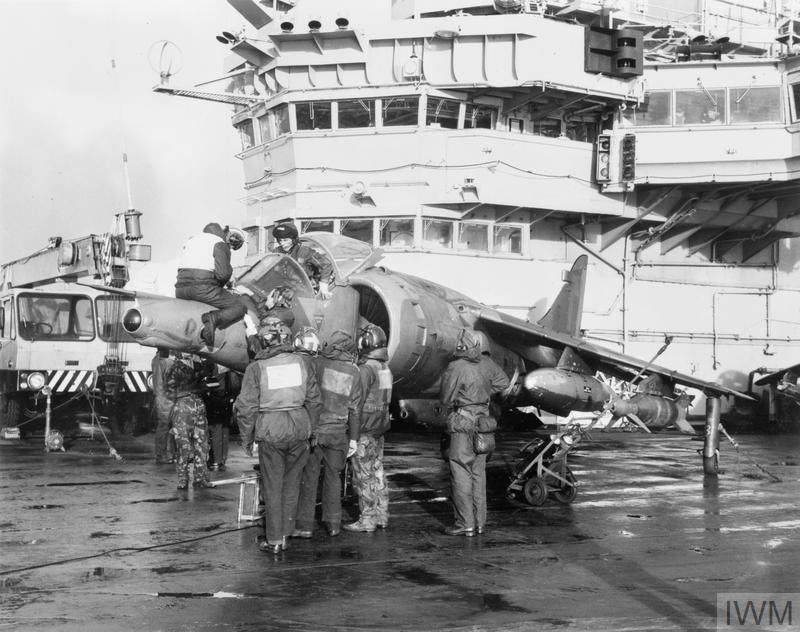
A Harrier GR3 loaded with Paveways aboard Hermes
Another helicopter had an even closer miss. A Lynx from Cardiff was conducting a regular search of the area south of the Falklands when the crew heard explosions and saw a Dagger flash past a bare 50 yards away. Two others also attempted to shoot down the helicopter with their rocket pods, but the pilot managed to evade all three, who were forced to return home empty-handed. In retaliation, the British sent a pair of GR3s from Hermes to attack the Argentine artillery near Moody Brook with Paveways. The kinks had finally been worked out with the designator, and one bomb scored a direct hit on a 155mm gun.
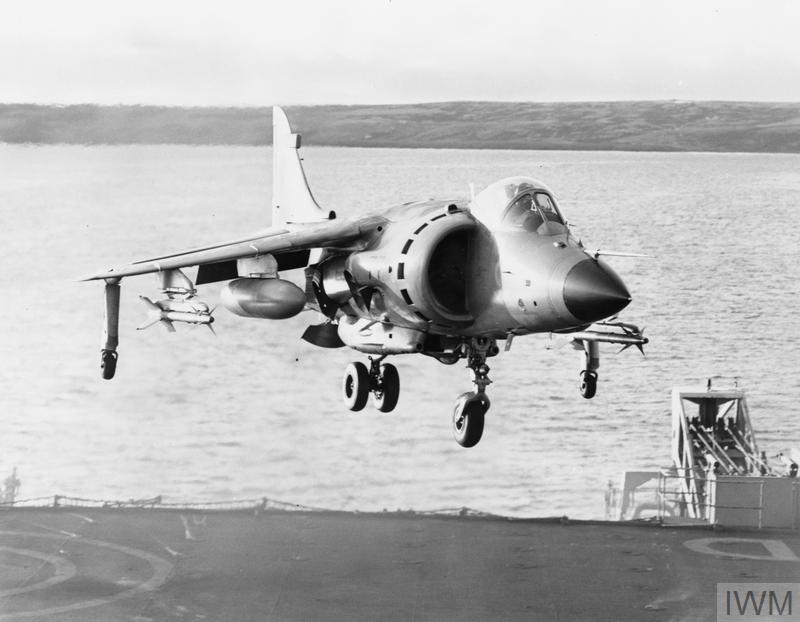
A Sea Harrier lands aboard Intrepid
Nor was that the end of air activity for the day. A quartet of Skyhawks were chased off by the CAP, while the Chinook made a heavy landing at San Carlos, damaging the strip there. A pair of Sea Harriers that were nearing the end of their patrol were forced to land aboard Fearless and Intrepid instead, the first operation by Sea Harriers aboard the LPDs. They refueled, but remained aboard the ships, which proved fortuitous when the CAP was drawn off by another raid an hour and a half later. When British radar picked up more inbound fighters from the other direction, the two aircraft scrambled and drove off the incoming Skyhawks.
The British had planned their final push for that night, and four frigates, Avenger, Yarmouth, Active and Ambuscade, were detailed to provide fire support. Cardiff took station to the north of the islands to cover them against nighttime air raids, which came in shortly after the bombardment began. A number of Canberra bombers, escorted by the Mirage IIIs that had been absent since the first day of the air war, arrived over the British positions near Mount Kent, and one of them fell victim to a Sea Dart from Cardiff. The frigate Penelope, escorting Nordic Ferry, reported that she was attacked by an Exocet, which she decoyed off, although this was later judged to be a false report due to the absence of Exocets in Argentine hands and the lack of launch platforms for any sort of anti-ship missile over the Falklands that evening. Several transport runs were made that evening, with the last aircraft, a naval Electra, escaping at 0100 on the 14th despite Ambuscade's best efforts to stop it. By then, the writing was on the wall, and VYCA-2 destroyed the TPS-43 radar that had given the British so much trouble in preparation for the surrender.
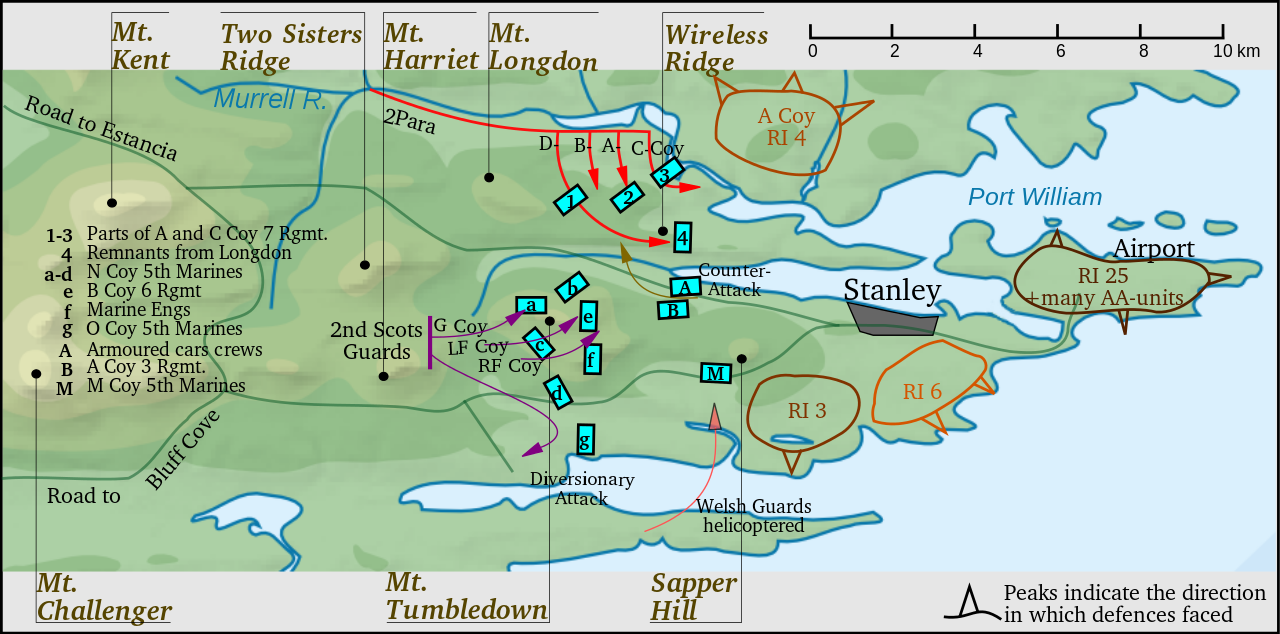
The British attack had begun three hours earlier. 2 Para, having sat out the battle on the 11th, was to take Wireless Ridge, while the Scots Guards attacked Mount Tumbledown. Both were defended by some of the more professional and effective units among the Argentine forces, but even their morale had been shaken by the British victories two days previously. The Para's attack went more smoothly than their assault on Goose Green had done, thanks to an increased appreciation for supporting fire, which was provided not only by Ambuscade, Yarmouth and a dozen 105mm guns, but also by a quartet of light tanks from the Blues and Royals. The shelling (over 6,000 rounds of artillery were fired in support of 2 Para that night) pushed the defenders off of the initial objectives, but while resistance did stiffen on Wireless Ridge proper, the Paras made excellent use of artillery, tanks, and their own heavy weapons to secure the entire position by dawn for the loss of only 3 dead and 11 wounded, an order of magnitude fewer casualties than they inflicted on their opponents.
Scots Guards on Mount Tumbledown
Mount Tumbledown was defended by Argentine Marines, probably the best of their soldiers, and its capture was in the hands of 5 Infantry Brigade, composed of units taken from ceremonial duties in London.2 The plan was for a silent advance on the enemy positions, covered by a diversionary attack on one of the position's flanks. The initial objectives were secured with little fighting, but the battles on the flanks turned into a close-quarters slugging match, despite the best that the heavy supporting fire, including that from Active and Avenger3 could do. Ultimately, the Scots Guards took Mount Tumbledown just as dawn was breaking, often fighting hand-to-hand with the defenders. Their losses were much heavier than the Paras, 15 men killed and about 60 wounded, although the Marines lost twice that. As the battle wound down, the Gurkhas pounced, taking nearby Mount Williams and completing the encirclement of Stanley. Now, all of the high ground around the capital was in British hands, and patrols from 2 Para had reached the outskirts of the city.
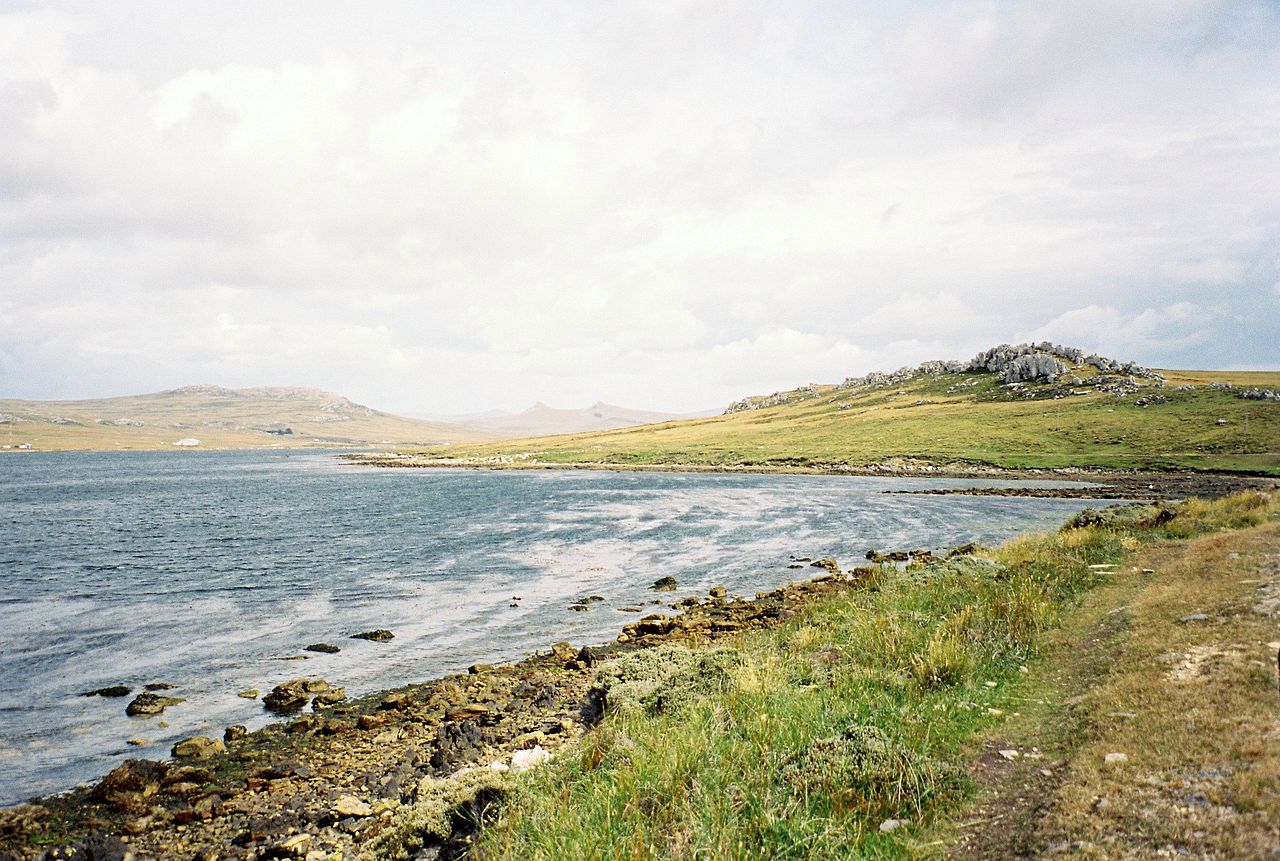
Mount Tumbledown, Two Sisters and Wireless Ridge from Stanley Harbor
About 8,000 troops remained in the city, and from the mainland, the Junta pressured the commander in the islands, General Mario Menendez, to fight on. However, it would have obviously been a losing battle. Most of his artillery was now on the front lines with no way to withdraw, and several guns were destroyed in a pre-dawn helicopter attack. The airfield was under direct observation and fire, making further supply runs impossible, the main supply dump was in British hands, and morale was near collapse. The British took advantage of this by landing two companies of 40 Command on Sapper Hill, the last piece of high ground in enemy hands, in the only opposed helicopter assault of the war. One group was dropped in the wrong place and suffered two wounded, but almost as soon as everyone was on the ground, they were told to cease fire, as surrender negotiations had begun at 1105. The news was carried back to the Battle Group by one of the GR3s, which had a Paveway attack called off due to the cease-fire.
"The Falkland Islands are once more under the government desired by their inhabitants. God Save the Queen."
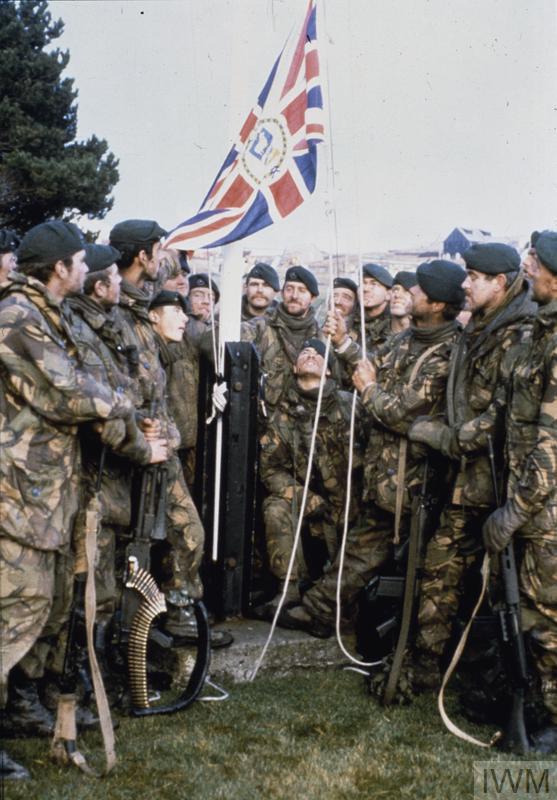
While this was good news for the British forces, Admiral Woodward issued orders emphasizing that the surrender would only cover forces on the islands themselves, and the air and sea threat remained undiminished. Negotiations dragged on until after dark, at which point a Sea King was dispatched to fly General Jeremy Moore, commander of the British forces ashore, from his headquarters aboard Fearless to Stanley to accept the Argentinian Surrender, which was signed at 8 PM local time.4 The next morning, Juliet Company, 42 Commando raised the Governor's flag over Government House. This was a unit made up of the Marines who had been on the island when Argentina invaded, and the flag itself was the one they'd taken with them when they'd surrendered seventy-four days earlier. All that remained now was to pick up the pieces.
1 For more information on ships and aircraft, as well as links to the whole series, see my Falklands Glossary. ⇑
2 And the Gurkhas, who have a ferocious reputation, but saw only a tiny bit of combat. This was apparently for several reasons. There was concern over their status as mercenaries, fear that their reputation would lead to claims of war crimes, and concern that casualties among them would be seen as sending Asians in to protect whites. ⇑
3 When entering Berkley Sound, one of Avenger's propellers struck an obstacle and shed a blade, limiting her to 16 kts. Unfortunately, I can't find any information on how the repair was carried out, but I suspect it was one of the many minor naval engineering miracles of the war. Another interesting fact about the naval support is that the British were essentially out of ammunition for their 4.5" guns, and would have been in trouble had the Argentinians continued to fight. ⇑
4 Moore was extremely concerned over what would happen if Menendez backed out, as any resumption of the fighting would likely lead to civilian casualties. He banned photographers from the signing ceremony, and struck out the word "unconditional" from the surrender document when Menendez balked, in defiance of his orders from the government, figuring it didn't really matter if it was there or not. ⇑
Comments
Is Parachuting a normal way of ferrying personnel to a ship? Also, I assume they parachute into the sea and are rapidly picked up by small crafts? That must have been a bit unpleasant in the south-pacific ocean...
Second question: Are the fixed-wing / Helicopter encounters you describe typical of such encounters? Do Jet fighters usually have trouble engaging the helos because of speed and maneuverability issues? Are anti-helicopter roles usually handled by other helicopters?
Parachuting is very much not a normal means of getting personnel out to ships. In fact, this is the only case I know of where it was done. (Not that I think it was never done otherwise, just that it was very rare.) Normally, you'd use a helicopter, or a cargo plane if you have a conventional carrier. It was only used here because they needed a way to get critical people and equipment to the South Atlantic faster than ships could get them there, and this was the only way. And yes, they jumped into the water, and got fished out. Definitely unpleasant, definitely for emergency use only.
Re helicopters, AIUI this sort of thing isn't uncommon. Dealing with a low-flying highly maneuverable target isn't easy. That said, the Daggers were primarily ground-attack aircraft, and I don't know how good their pilots were at air-to-air work. Most anti-helo missions are carried out by ground-based air defenses. Yes, a lot of helicopters carry AAMs, but that's mostly for self-defense. I don't know of anyone who plans to send helicopters out as anti-air platforms. But this is also way outside my area of expertise.
Right, Atlantic, not Pacific. My bad.
Thanks for the answers!
Parachuting personnel to meet a ship is not routine, although my understanding is it's also not unheard of for various SOF units. IIRC, in the movie Captain Phillips, the SEALs are depicted as making their way to BAINBRIDGE via parachute deployment; I do not know if that was actually how it went down.
People certainly noticed at the time that it was bizarre to send the Gurkhas to the Falklands and then hardly use them, while ceremonial-duties units were given some of the hardest objectives. I recall speculation that the British government had decided that giving the Gurkhas too much to do would be politically uncomfortable; they didn’t want the Argentinians to be able to say that their boys were being massacred by pitiless Asian mercenaries, and they also didn’t want to invite the criticism that they were treating brown lives as more expendable than white, attitudes on such things having changed a lot by 1982.
I got answers to this while researching Part 24 and forgot to update that footnote. I want to say that it was the official campaign history which said that they were actually pretty happy with how things worked out. The Gurkhas got just a tiny bit of combat, the Argentinians were terrified of them, but never really had anything to complain about, and the public optics weren't bad for the reasons you mention. There was also some concern about their status as mercenaries under international law.
Blackshoe, you're right, the SEALs did parachute to board the Bainbridge shadowing the captured ship.
Like you, IIRC, they took an intel specialist that they needed who had never parachuted and strapped him in a dual chute rig to a big SEAL. He came out fine, as did the op, as everyone knows.